Friday, October 27, 2017

Last Minute Halloween Costume & Makeup: Maleficent

I feel like it's always the year that you think you have tons of time to plan ahead for Halloween, that end up being the year that you somehow end up scrambling at the last minute to scrounge together a costume. I guess I'm a pretty good procrastinator. I really do love spending time developing my Halloween costumes, but this time around, things just got a bit too busy the last few weeks and I just couldn't dedicate that kind of time to it. Regardless, I'm pretty happy with the results. I've been wanting to do a Maleficent Halloween costume for a few years now, primarily because I wanted to try my hand at doing those crazy Maleficent cheekbones! And hey - a villain who wears red lipstick? That's right up my alley.


I sourced all the makeup I needed for this look from what I already had at home, minus the White Cream Makeup, which I purchased at Value Village. I also went to Value Village for the costume part of the look, and ended up finding the perfect pieces to build the costume: the horn headband with widow's peak, a simple black cape, and a staff. I also made a quick trip to the dollar store for some electrical tape, black paint, and a black headscarf. The rest of the costume, I was also able source from what I already had at home! If you want to re-create this look as a last minute costume for Halloween, here's everything you'll need:

The Maleficent Makeup:


I would have liked to actually film a tutorial of this makeup look, but to be honest, I wouldn't have had time to prep, film and edit that all. So I'll do my best to describe it step-by-step below:
  1. Apply a layer of foundation, but add in some white cream makeup to give yourself a paler complexion. You could also just buy a lighter shade of foundation.
  2. Fill in your brows a bit darker than their natural colour, and give them a more dramatic, arched look
  3. For those razor-sharp cheekbones Maleficent is known for, I used the combination of a brown and a grey matte eyeshadow to sculpt along the tops of my cheekbones, and up by temple. I used the NYX Dream Catcher Palette in Stormy Skies. You should be creating pretty close to a 90 degree angle: straight down your temple, and then straight along your cheekbone.
  4. To make those sculpted cheekbones more defined, use a lighter concealer than your skintone, or some more white cream makeup, to draw a thin line right above where you just sculpted with the eyeshadows. Blend in with a brush or your fingers. Now, you should have a somewhat clear 'L' shape, along your cheekbone and up your temple.
  5. Use those same brown and grey eyeshadows to do your eyes. Use them as the crease. and use a light matte shade for the centre of your lid. Use the brown and grey underneath your eyes as well. I also added the NYX Faux Whites Eye Brightener in Mint Cream to my waterline.
  6. I applied a thin layer of Maybelline Waterproof Liquid Eyeliner, and drew it out past the inside corners of my eyes.
  7. Lastly, I filled in my lips with the perfect red - NYX Butter Lipstick in Big Cherry. To try and make them look fuller, like Angelina Jolie's version of Maleficent, I also added some black lines using the black eyeshadow from the Dream Catcher palette, and blended them in with a lip brush.


The Maleficent Costume:
  • Horns headband with widow's peak (via Value Village)
  • Black cape (via Value Village)
  • Staff (via Value Village)
  • Black choker necklace
  • Little black dress
  • Over-the-knee black suede boots
  • Black pirate's headscarf (via Dollarama)
  • Black electrical tape (via Dollarama)
  • Black paint (via Dollarama)

This is actually a SUPER easy costume to put together! You really only need to buy a few things, and the rest is DIY:
  1. I took the horns headband with widow's peak that I found at Value Village and used electrical tape to make them look more like the ones in the Maleficent movie. The original horns here were fabric and had silver on them, which I wasn't crazy about. Putting the electrical tape around the horns worked perfect to cover it up!
  2. I don't have black hair, and the headband didn't cover enough of my blonde hair, so I ended up taking a pirate's headscarf, turning it inside out so not to show the pirate symbol, and tied all my hair up underneath it. Voila!
  3. Got a black choker, or a black tie you can turn into a choker? Done.
  4. You can pick up a super cheap and simple cape at Value Village.
  5. Underneath the call, all you'll need is a little black dress!
  6. You can wear black heels, or, I decided on over-the-knee suede boots so I could look good while staying warm.
  7. I picked up a plastic staff from Value Village and painted it black to match the rest of the costume.


And there you go! Everything you need for an easy DIY costume - and you can go as simple or as complex with the makeup part as you like. Not up for the makeup look I did? You could just contour a little heavier than usual, and go with the red lips.


Happy Styling! xo

~ Britta


Wednesday, October 25, 2017

Thoughts on My First Lash Extension Experience

Today, we're talking all about lashes and eyelash extensions! Here on Vancouver Vogue, I want share info on all kinds of beauty topics, from the top products and trends, to some cool services worth trying. Two weeks ago, I got eyelash extensions for the first time, and wanted to share my experience - especially in case you've ever considered trying them, but had some reservations about the process. Cathy is a certified lash technician with The Lash Stop in Richmond, BC, and calmly walked me through the whole thing, and did a wonderful job.

Now, I have pretty long lashes already, so I'm not who you'd normally peg as someone who needs/would want lash extensions. But the thing is, the tips of my lashes are blonde, which means if they don't have mascara on them, they appear waaay shorter than they actually are. And honestly, most people (including myself) just don't have the fullness (read: number of lashes) we wish we had. Of course, false lashes are certainly an option, but I've become far worse at applying them since high school, and now it usually just gets me frustrated with glue everywhere. For special occasions, sure they're fine, but I certainly wouldn't have enough patience to apply them every day.


By far the best part about having lash extensions is how easy it makes my daily routine now. And by that, I mean my daily routine has become basically non-existent, which is great! I've noticed, with the lash extensions, I'm far more likely to just call it a day and not wear any other makeup at all, because I feel like the extensions really make me look awake and polished. I think lash extensions would be a particularly great choice if you're going on vacation (especially somewhere tropical) and don't want the fuss of makeup when out travelling, swimming, etc.

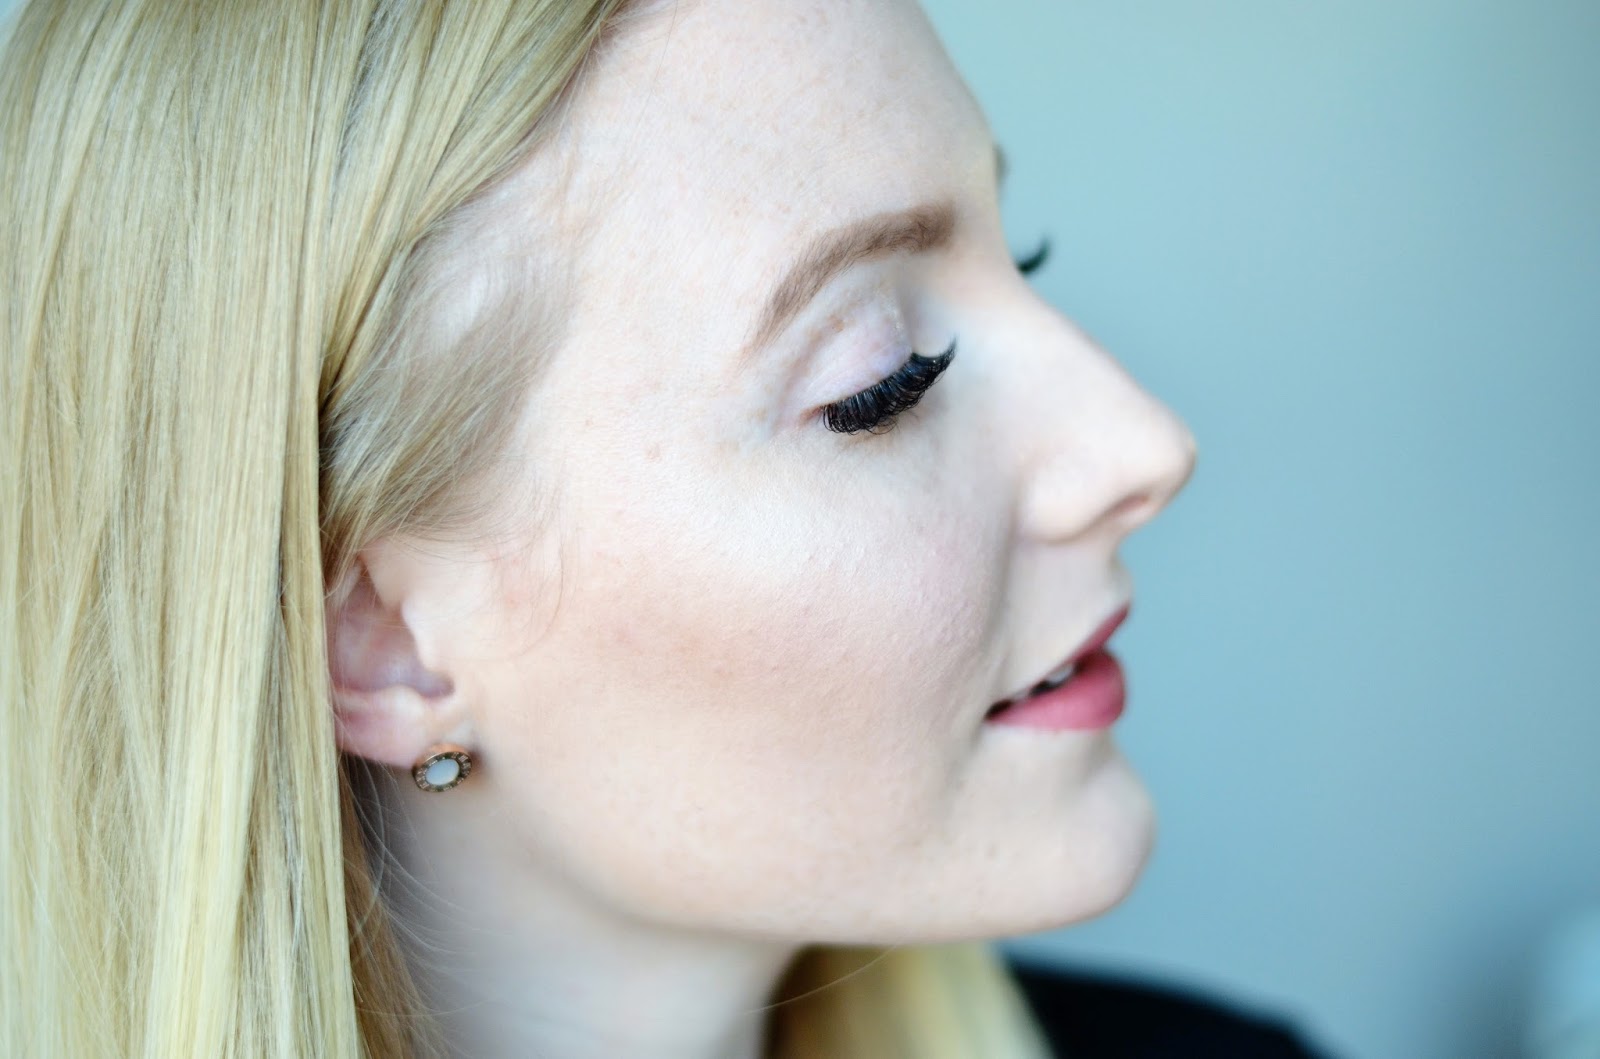
My one fear was that the extensions would look like a big black mass across my eyelashes, kind of like what it looks like when you buy cheap false eyelashes. I was so pleasantly surprised that they looked so natural - and yet at the same time, so pretty and fluttery! I was super impressed with the look and feel of the extensions. It's not something I would have done all the time, but something I would definitely get done as a treat every once in a while, or if I'm planning a vacation, etc. Cathy did such a great job, and I can't wait to go back and get a fill next week so they continue to look gorgeous! I've had so many compliments on them so far.


What to know for your appointment:
  1. Don't wear any eye makeup. This is probably a no-brainer, but hey I'm sure there's that one person who will forget.
  2. Wear something you're comfortable lying down in. When you arrive, you'll lie on your back on a massage-type table so that the lash technician can have the best position to apply your extensions.
  3. You'll be asked what kind of set of lashes you'd like, as well as how much curl you want. It's worth doing some research online before you go, so you can show the lash technician what look you're hoping to achieve with the extensions. I just suggested I wanted something on the more natural side, and Cathy said the classic set would be perfect for that. And it was!
  4. The extensions take some time to apply. The lash technician will be gluing the lash extensions right to the base of your natural lashes. One lash at a time. As you can imagine, it's a pretty detailed process! So just be prepared to relax (and maybe take a nap) while they do their magic. The Lash Stop had some soothing spa music playing, which definitely makes you fall into a lovely state of relaxation.
  5. To make sure your lashes stay fanned out, you should get an eyelash comb before you leave - The Lash Stop includes that in their little take-away bag. It's basically a clean mascara wand that is used to comb through your lashes, keeping them from getting tangled. Cathy even puts adorable little covers on them, so you can pop them in your purse without them getting caught on things.
  6. Don't shower (aka get your lashes wet) for at least 24 hours after the application, to make sure they set properly. You want them to last, after all!


Lash extension FAQ's:

How long does it take to have extensions applied? Cathy says it can be from 2 to 3 hours for a full set. Mine took about 2 hours. At least it was a very relaxing 2 hours! It was actually really nice to put my phone away, close my eyes, and just take it easy.

How long do they last? Your lashes naturally fall out around the 45-90 day mark, so your lash extensions will start to dissipate at that point too. Cathy says that about 2 weeks after the application is a good time to get a fill.

How much does it cost? The Lash Stop's full classic set is $65, and a fill is $45. From what I've heard/seen out there, this is a really good deal! Of course, a fill is a bit cheaper because it's a shorter appointment, as they're just filling in the gaps where your lash extensions have grown out/fallen out.

Are there some tips to make the extensions last longer? Try not to sleep on your stomach, or in general with your head smushed into your pillow. This will help keep the integrity of the lash shape. Also, try to stop yourself from rubbing your eyes too much.

Can I use makeup remover on the extensions? Yes, but don't use an oil-based makeup remover. Instead, a micellar solution would be ideal. The Lash Stop supplies you with a little care package with a soft brush which is perfect for delicately applying your makeup remover to the lash area!

Do I/can I apply mascara on my lash extensions? No, the lash extensions are relatively fragile, so applying mascara, which inevitably you will want to take off, is not a good idea. You really shouldn't need mascara anyway - the whole point of lash extensions is to save you that step!


If you're in the Greater Vancouver Area, I highly recommend reaching out to Cathy at The Lash Stop! She does a fabulous job. Some people like to treat themselves with regular manicures - but now I think I would rather treat myself to lash extensions! It's all about deciding where in your routine you'd like to save some time, and what you think will really make you the most confident, at the end of the day.


Happy Styling! xo

~ Britta


Disclaimer: The Lash Stop provided this lash extension service complimentary for me to review. As always, opinions are my own.

Monday, October 23, 2017

Fall Shopping Spree at Metrotown: What Would You Buy with $5,000?

Back in September, I got you guys thinking about what it would be like to win $50,000. I loved hearing everyone's ideas on what they would buy if they won BCLC's Daily Grand Shopping Spree Contest!

Well, don't stop dreaming guys, there’s more to the Daily Grand Contest because you could still win $5,000 in gift cards for Metropolis at Metrotown or any mall owned by Ivanhoe Cambridge! Oh and I'm holding a $100 giveaway on Instagram too - so don't miss that. And just to get you all amped up about how you could #LiveGrand if you win one of those awesome prizes, the bf and I did a $1,000 shopping spree at Metrotown a few weeks ago! You can check out our adventure below. Maybe it'll give you some ideas as to what you might buy if you win.

Scroll through the photos below for some of our shopping spree tips and details on how you can enter to win one of the $5,000 prizes!


Ready to Live Grand? BCLC is going to give away 4 prizes of $5,000 in gift cards for Metropolis at Metrotown, or any mall owned by Ivanehoe Cambridge! This contest is taking place on October 28th at the Grand Court of Metrotown (outside Uniqlo). You can click here for full contest details. Hope to see you all at Metrotown on Oct. 28th!


Shopping Spree Tip #1: Do your homework. Take a look at retailers online and figure out where are the best stores to visit to find what you're after. I was specifically looking for a pair of black over-the-knee boots, and quickly figured out that Call It Spring was my best bet.


Very happy with my new HOLMFIELD boots from Call It Spring - exactly what I was looking for!


This kisses blouse from Winners totally caught my eye!


Shopping Spree Tip #2: Find ways to make your spree $$ last longer. The bf decided on choosing a couple of new watch straps from Fossil, rather than buying a whole new watch. They were a great deal, awesome quality, and now he can change up his original Fossil watch whenever he likes for a totally new look!


Shopping Spree Tip #3: Splurge a bit, save a bit. We didn't go crazy on splurge items, but I did get this beautiful Karl Lagerfeld leather purse from the Bay. I was willing to spend $187 on it, but when we got to the cash it was $80!!! I was literally in shock. Ever seen that Ikea commercial "start the car!" - that's how I felt. Seriously.


Shopping Spree Tip #4: Think basics and must-haves. Instead of impulse buying things you may not want a month from now, make a wishlist of things you want/need most. Save most of your spree for those items...and a little wiggle room for some fun impulse buys.


Shopping Spree Tip #5: Just because you've been pining over something online, doesn't mean it's meant to be. Know when to let go. This Banana Republic x Olivia Palmero coat was love at first sight when I saw it online. But in person, I definitely seem to be too short for it. Sadly, this one had to go back on the rack, even though I really wanted to take it home.


Shopping Spree Tip #6: Wear comfy shoes, and clothes you can easily change in and out of. You don't want anything slowing you down!


Found this fabulous tee at The Bay!


Curious exactly what we walked away with after spending $1,000? Here's the full break down:
  1. Winners - Kisses blouse
  2. Winners - Soft grey tie arm sweater
  3. Winners - Dockers men's socks
  4. Winners - Adidas Trefoil tee
  5. The Bay - Karl Lagerfeld Paris leather purse (similar)
  6. Sephora - Fenty Beauty Gloss Bomb
  7. Sephora - Kat Von D Lock It Foundation
  8. Fossil - 22mm dark brown leather watch strap
  9. Fossil - 20mm black leather watch strap
  10. Call It Spring - HOLMFIELD over-the-knee boots
  11. Zara - Bejewelled plaid shirt dress
  12. Zara - Grey palazzo trousers
  13. Zara - Black loose tie shirt
  14. Zara - Pyjama top
  15. Aritzia - Black Quincey Jacket
  16. Stockhomme - Green bomber jacket
  17. Beachouse - Army green joggers
  18. Beachouse - Tan brown joggers
__________________________________
        For a grand total of $1,000!


Happy Styling! xo

~ Britta


Disclaimer: BCLC provided us with $1,000 in gift cards to promote the Daily Grand Shopping Spree contest. As always, opinions are entirely my own!


Wednesday, October 18, 2017

Fall 2017 Eyewear Trends


Recently, I've been noticing my sight has gotten pretty bad when it comes to distance. Street signs that used to be clear now just aren't, reading a fast food menu signs has somehow become a challenge... I guess that just comes with age! Luckily, I've seen the silver lining in my new need for distance glasses (I already have reading glasses), and have been embracing eye wear style.

There are a few major trends for Fall 2017 when it comes to eye wear: flat matte, gold accents, thin metal, versatile neutrals and distinct tortoise. I'd always been intrigued by bold, tortoise frames, so I went in search of a pair at Clearly; they have two shops in Vancouver, one in Kitsilano and one in the heart of downtown, but you can also shop them online. I came across this awesome stand-out pair by Derek Cardigan, in the perfect tortoise pattern. The style is 7014. I'm not usually one to mix browns and blacks, but I find this tortoise pattern goes really well with both my brown and black outfits because of the deep shade.

One of my first days wearing the new specs, we headed out to Taves Family Farm in Abbotsford for some full-fledged fall fun (phew that's a lot of f's!)! They have pretty much everything you could imagine: a corn maze, pumpkin patch, apple farm, petting zoo - the works. We managed to get through the corn maze without getting too lost, and all walked away with the perfect pumpkins to carve. I snagged a few super cute mini pumpkins too, that you'll see below. Oh - and can't forget the apple cider! I picked up a couple of jugs of that to mix with spiced whiskey at home. Yum. The best part of the day? Everything was crystal clear, in 20/20 vision. It's actually still pretty crazy to me - I kept taking my glasses on and off, just to see the comparison!

Which fall eye wear trend would you be most excited to try?


Glasses - c/o Clearly | Vest - Aeropostale (similar) | Sweater - Forever 21 (similar) | Shirt - Zara | Bracelet - c/o Nobis & Grey | Purse - thrifted | Jeans - Winners | Boots - Just Fab (similar)


Happy Styling! xo

~ Britta


Disclaimer: The Derek Cardigan glasses were provided to me by Clearly for review in this post. As always, opinions are my own.
Related Posts Plugin for WordPress, Blogger...